Step 1: Install and set up Wireshark on Ubuntu
Task 1: Install and Set Up WireShark for Non-Super Users
Ensure proper permissions by setting up WireShark for users belonging to the WireShark group.
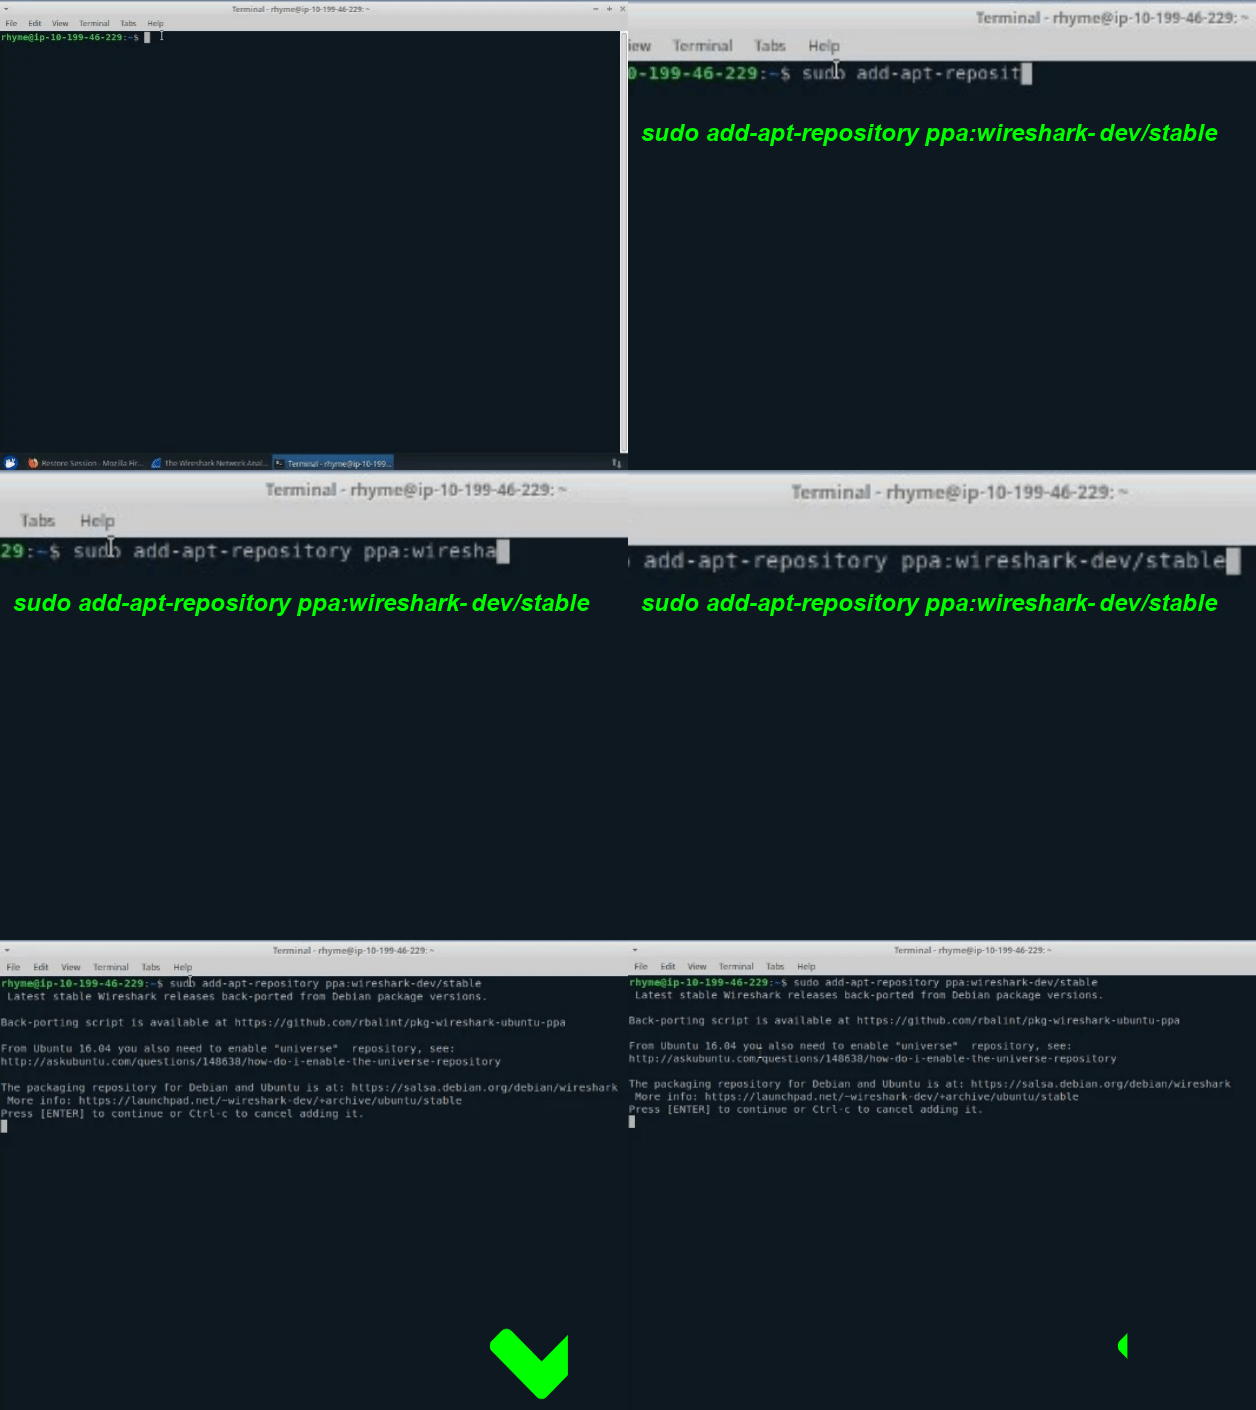
Get the latest stable version by adding the WireShark repository using the "sudo add-apt-repository ppa:wire-shark-dev/stable" command.
Emphasize not running WireShark as a super user for security reasons.
Project: Capturing and Filtering Packets using WireShark


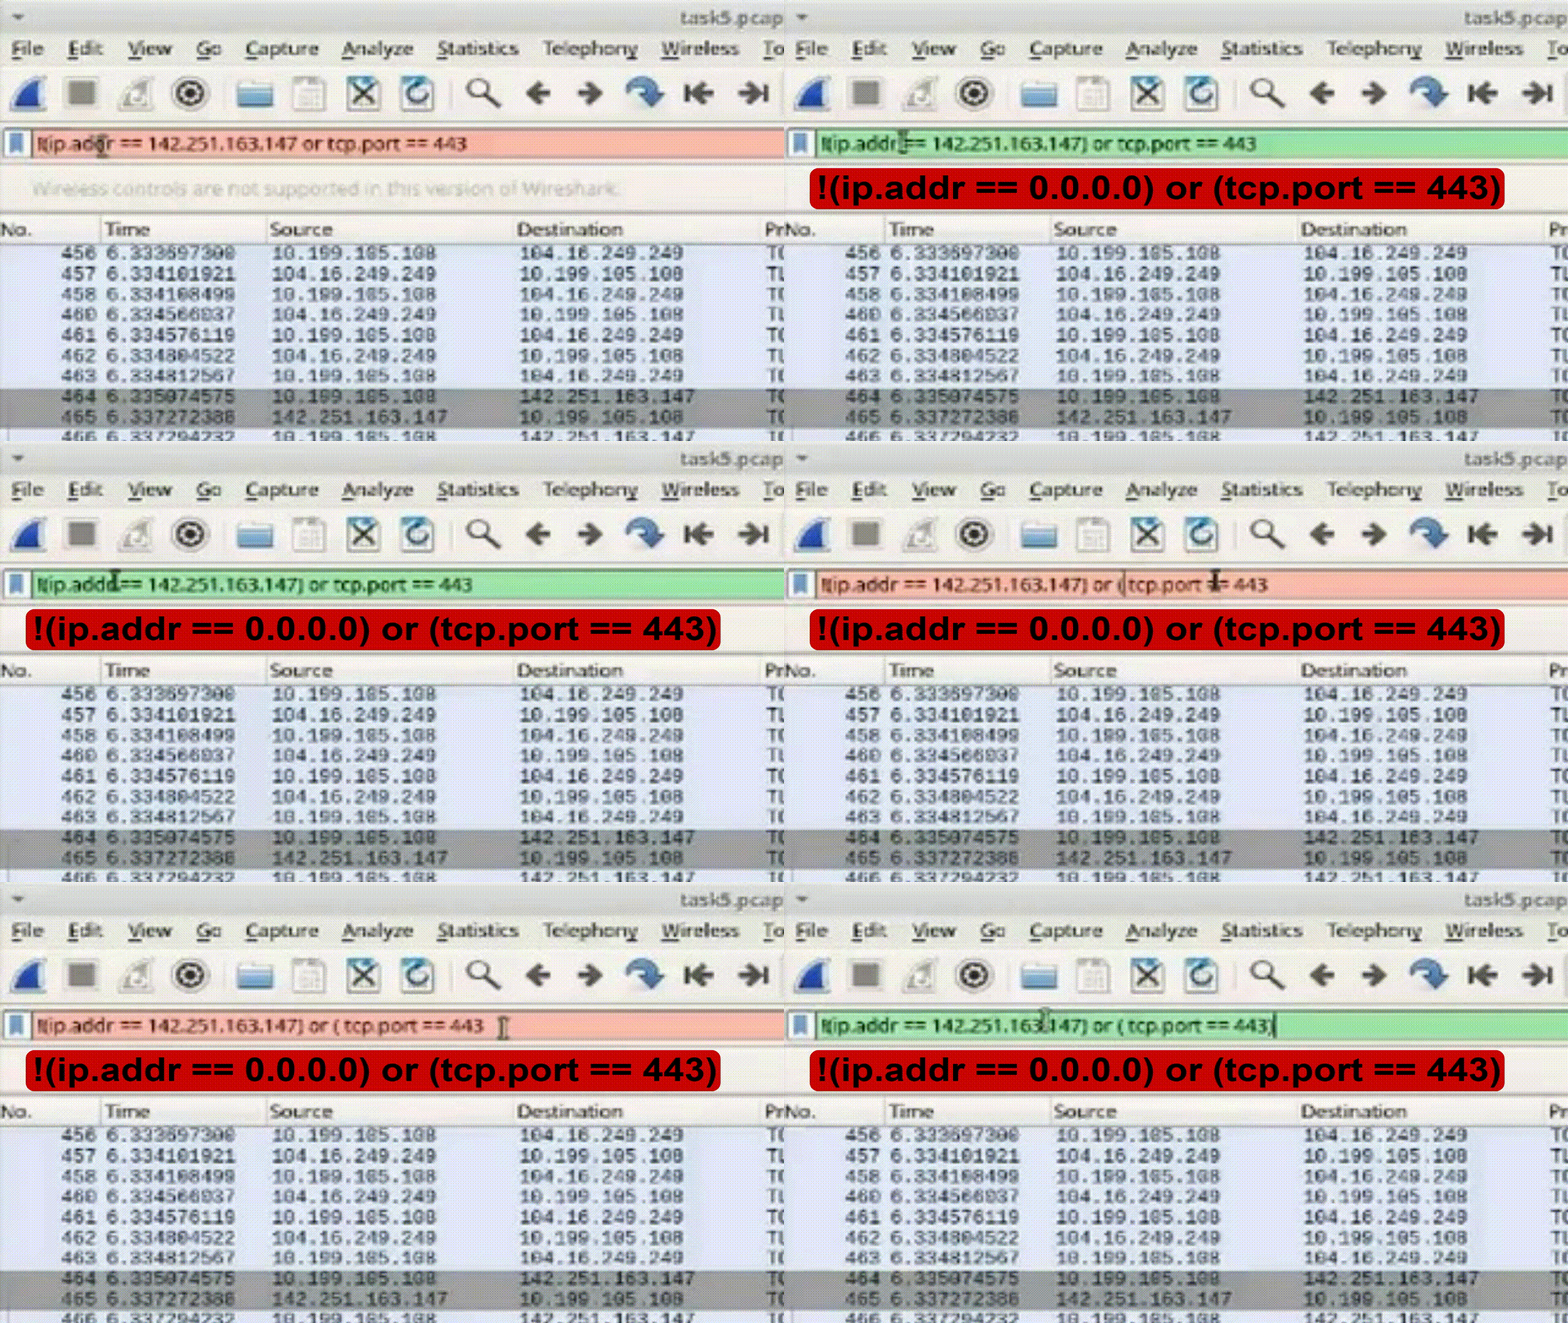
Task 4: Combine Filters with OR and NOT Conditions
1. Construct conditional filter combining OR and NOT conditions.
2. Apply filter to display packets that doesn't include HTTPS packets and excluding specific IP addresses or ports: !(ip.addr == 0.0.0.0) or (tcp.port == 443).
3. Additionally, one can apply a filter to display packets that include both HTTP and HTTPS packets while excluding specific IP addresses or ports: !(ip.addr == 0.0.0.0) and (tcp.port == 80 or tcp.port == 443).
4. Ensure the use of parentheses for proper order of execution.
*Conditional filters help isolate and refine packet display, reducing noise and focusing on pertinent information for analysis.
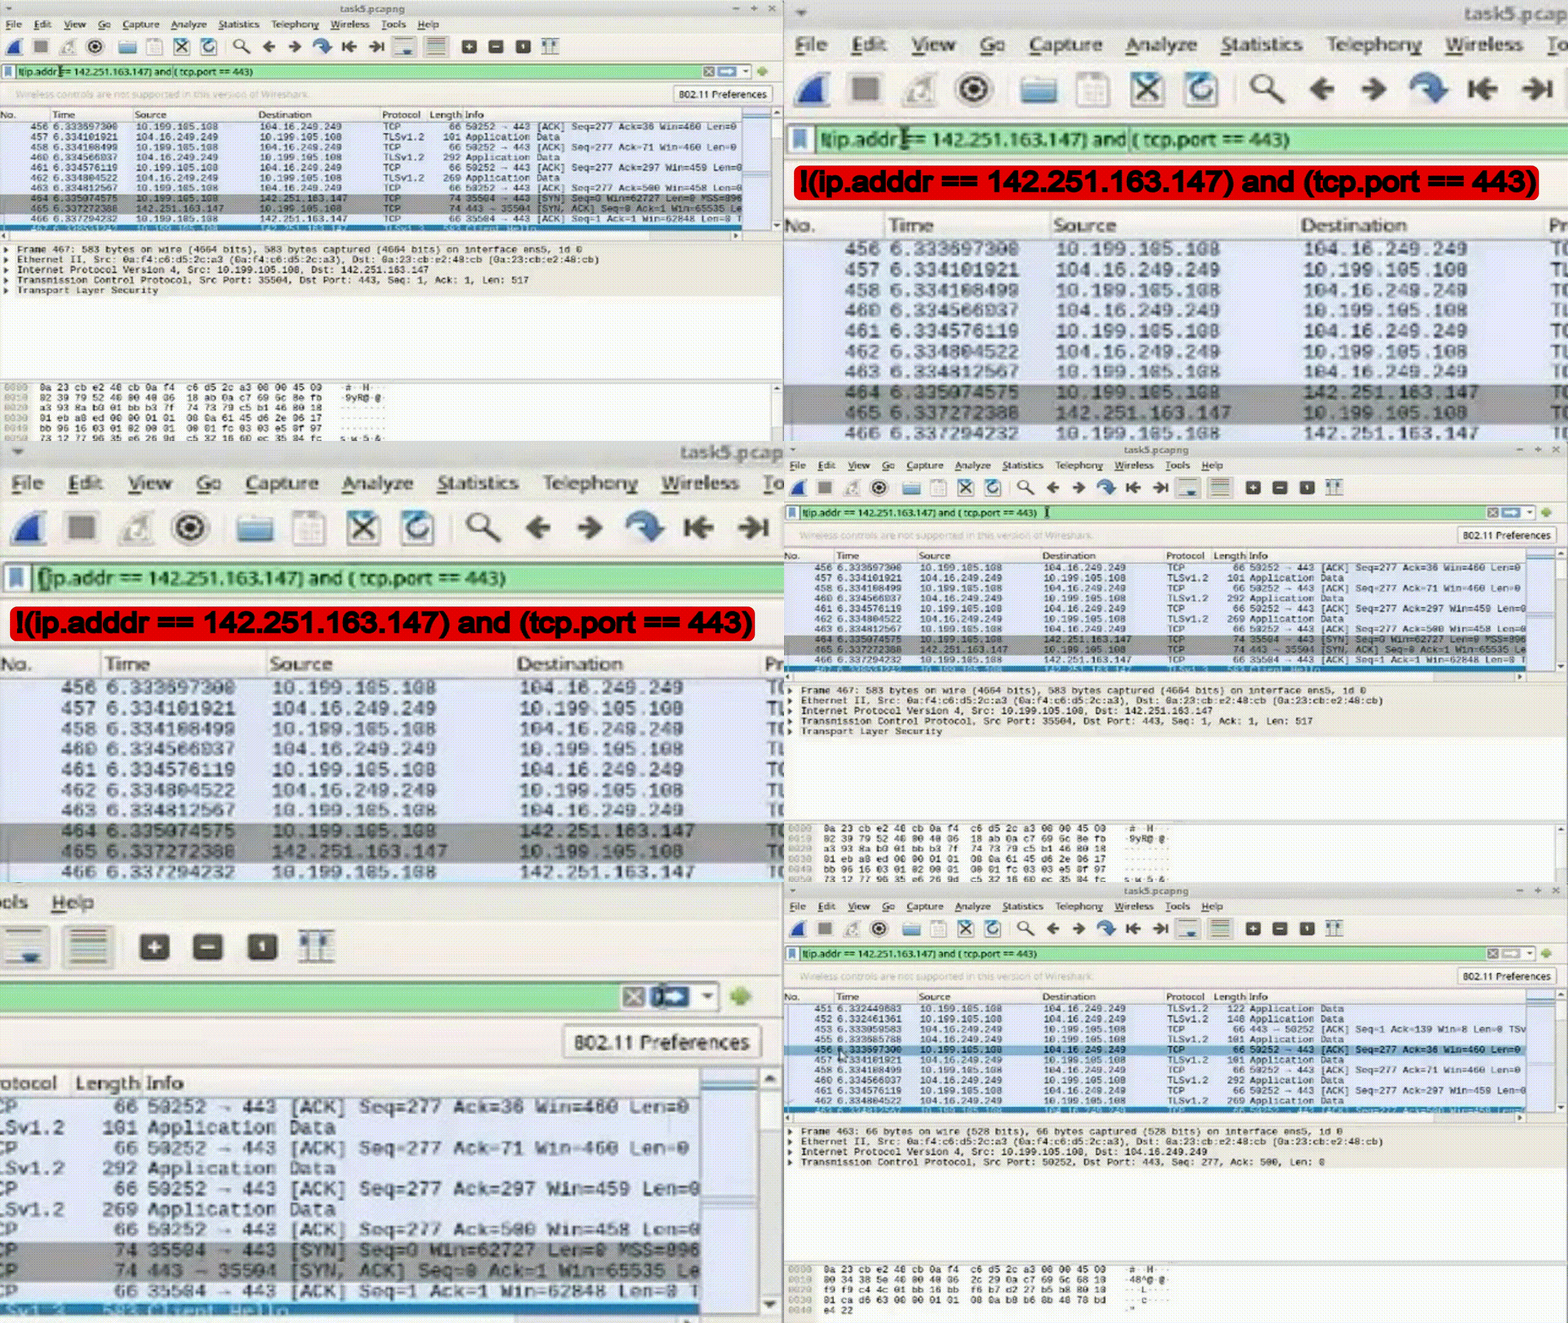
Task 3: Conditional Filtering for HTTPS Packets
1. Apply the compound filter to observe the desired packets.
2. Enhance the filter while excluding the specific IP address: !(ip.addr == 8.43.85.97) and (tcp.port == 443).
Task 2: Conditional Filtering for Packet Selection
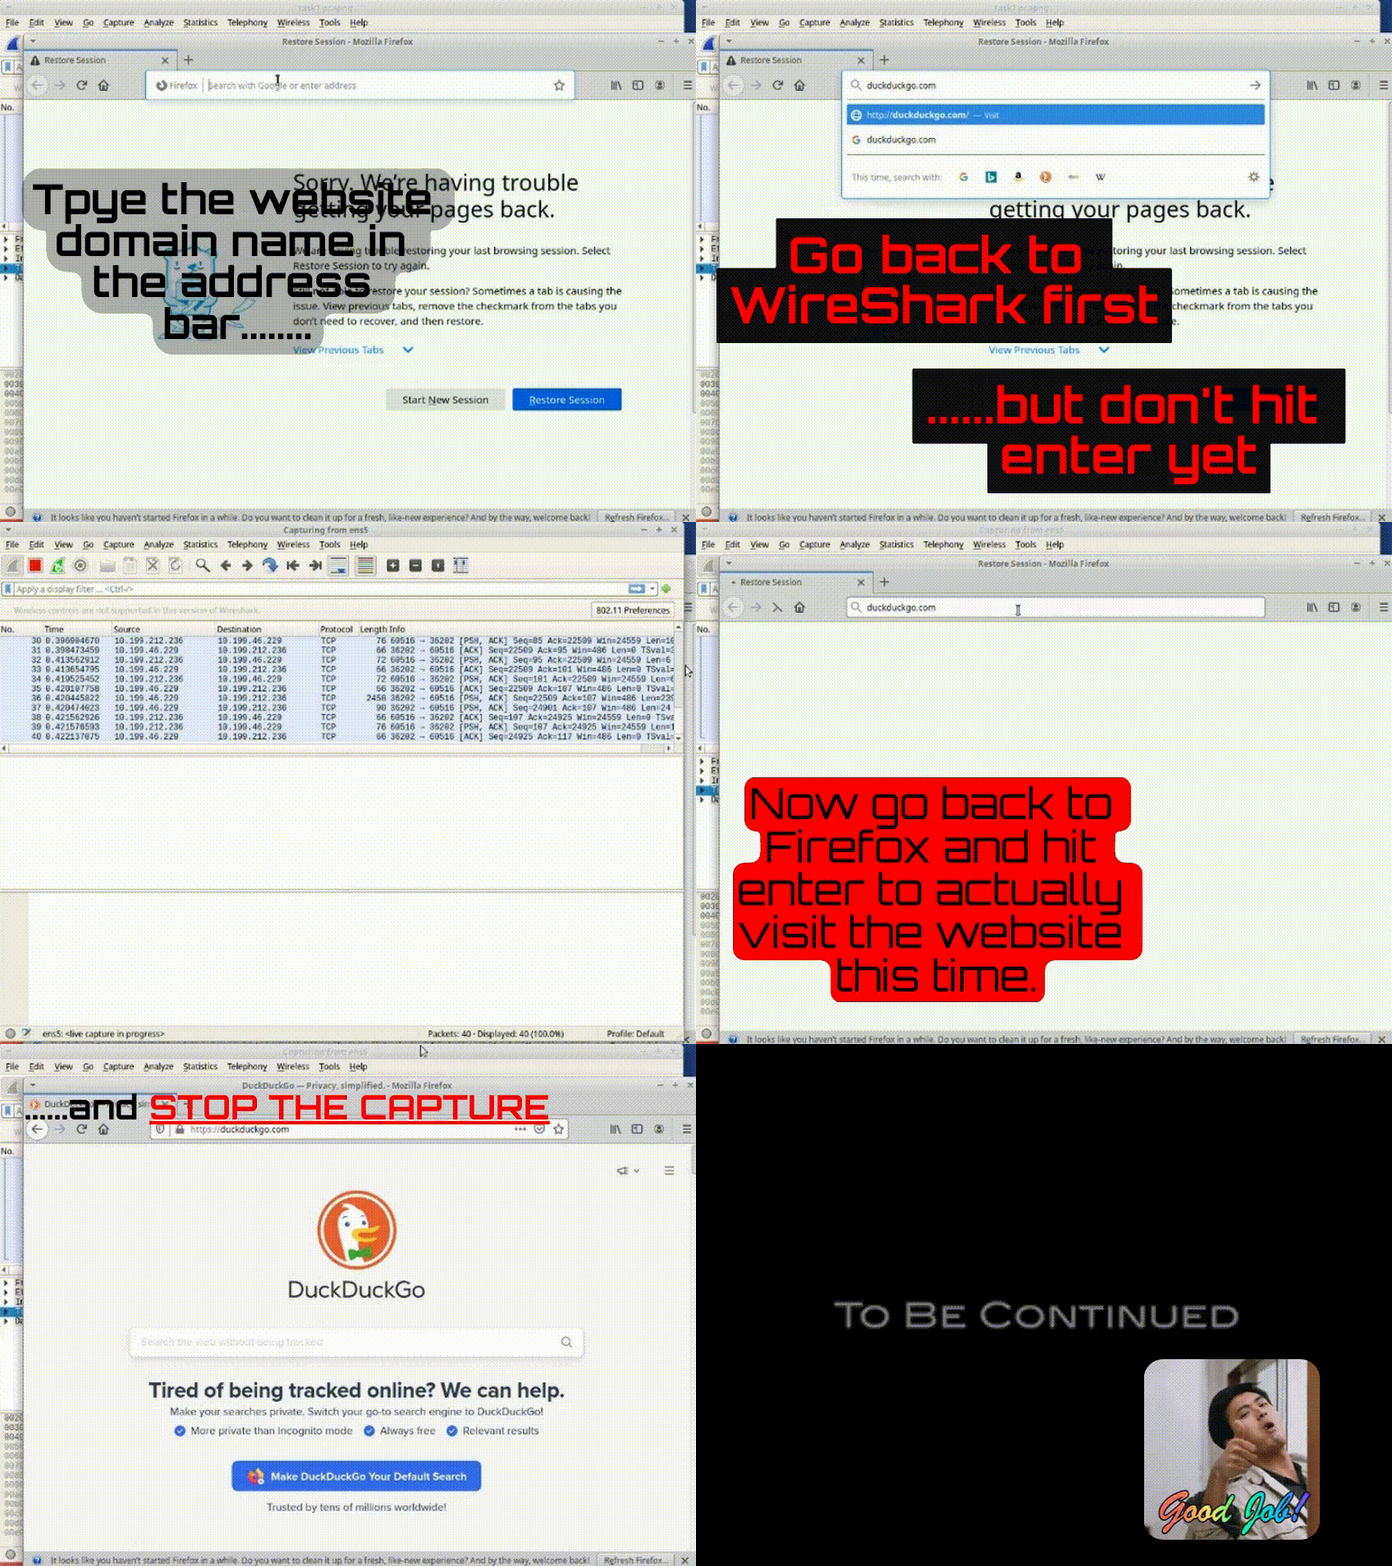
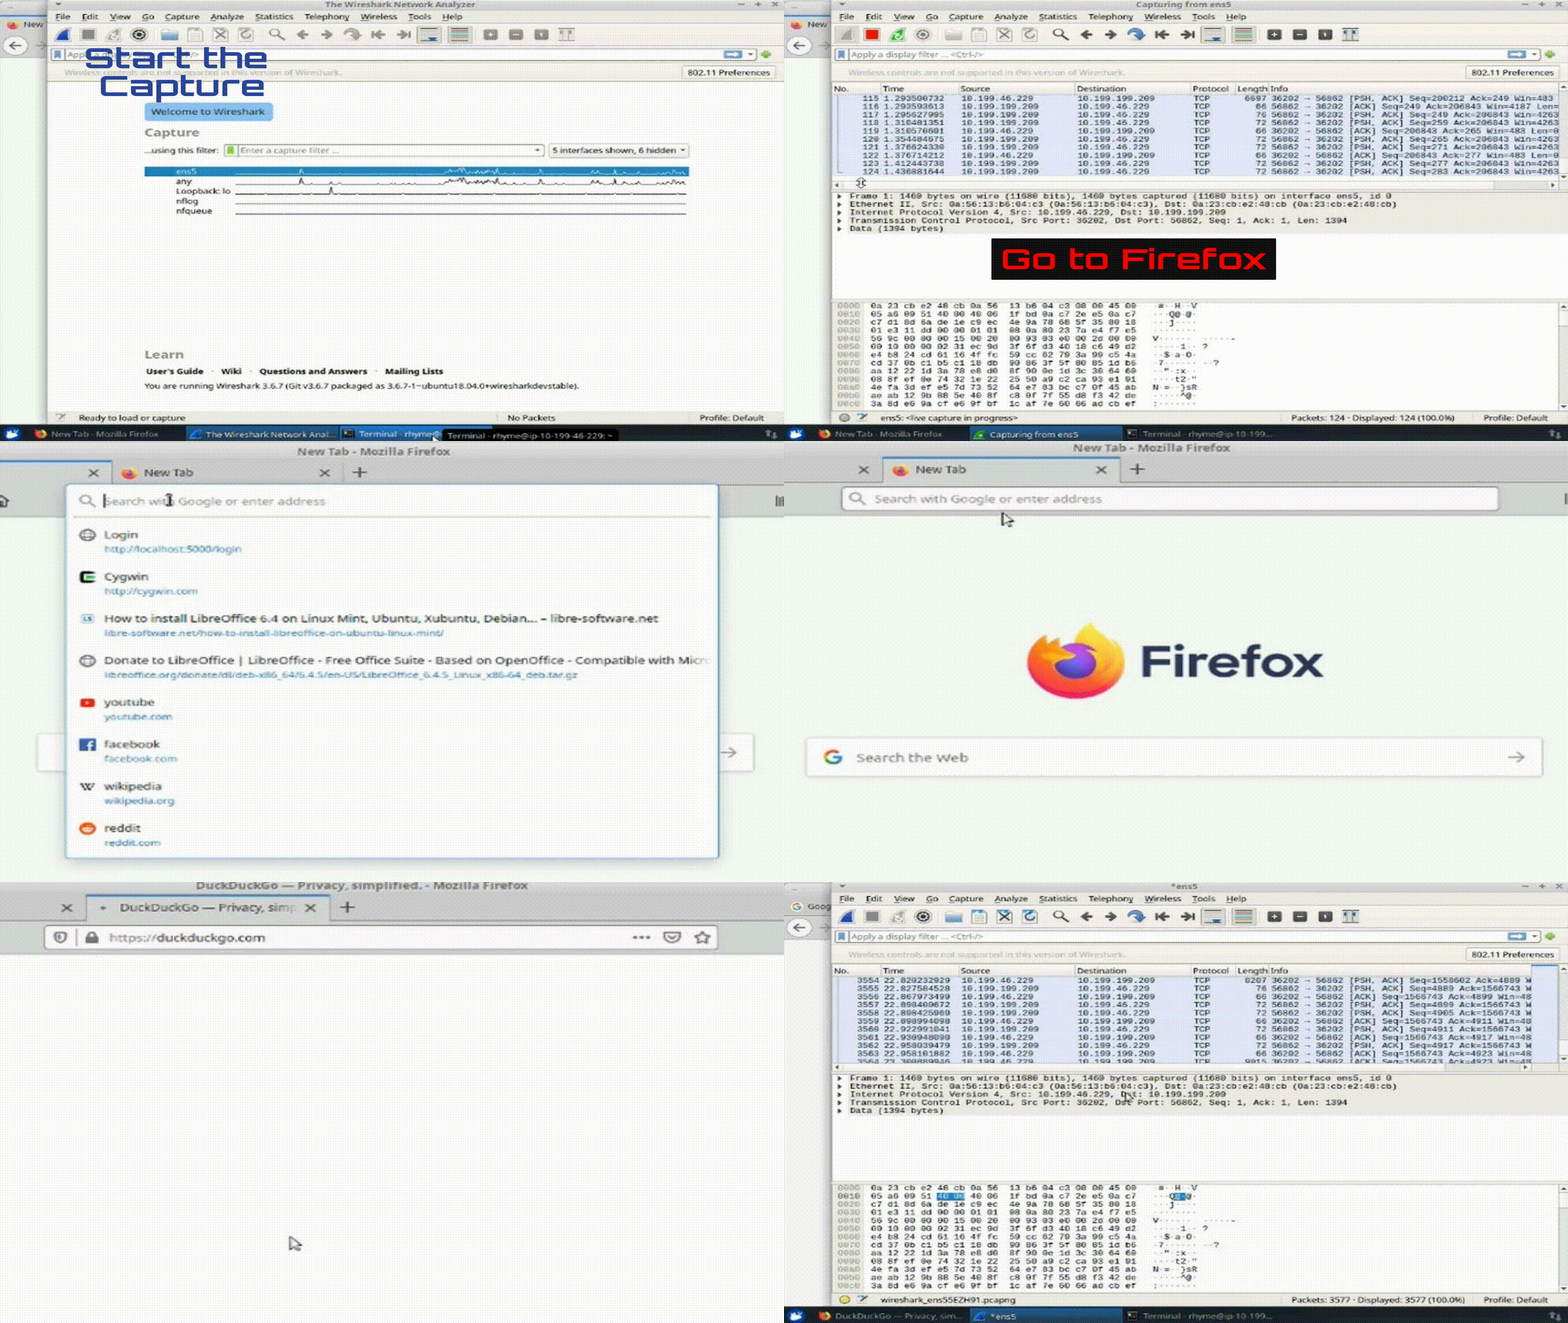
1. Start Wireshark capture on the Ethernet port.
2. Visit "google.com" and "duckduckgo.com" in separate Firefox tabs.
3. Stop Wireshark capture and save the packets to a file.
*Capturing packets during website visits allows analysis of network behavior, identifying potential issues, and patterns of data exchange.
Step 5: HTTPS packet capture NOT containing a certain IP address
Task 1: Clear Browser Cache for Accurate Web Page Loading
1. Open Firefox browser settings.
2. Navigate to "Privacy & Security."
3. Clear cache to ensure up-to-date website loading.
*Clearing cache guarantees accurate analysis of packet traffic as it reflects the latest web page versions.
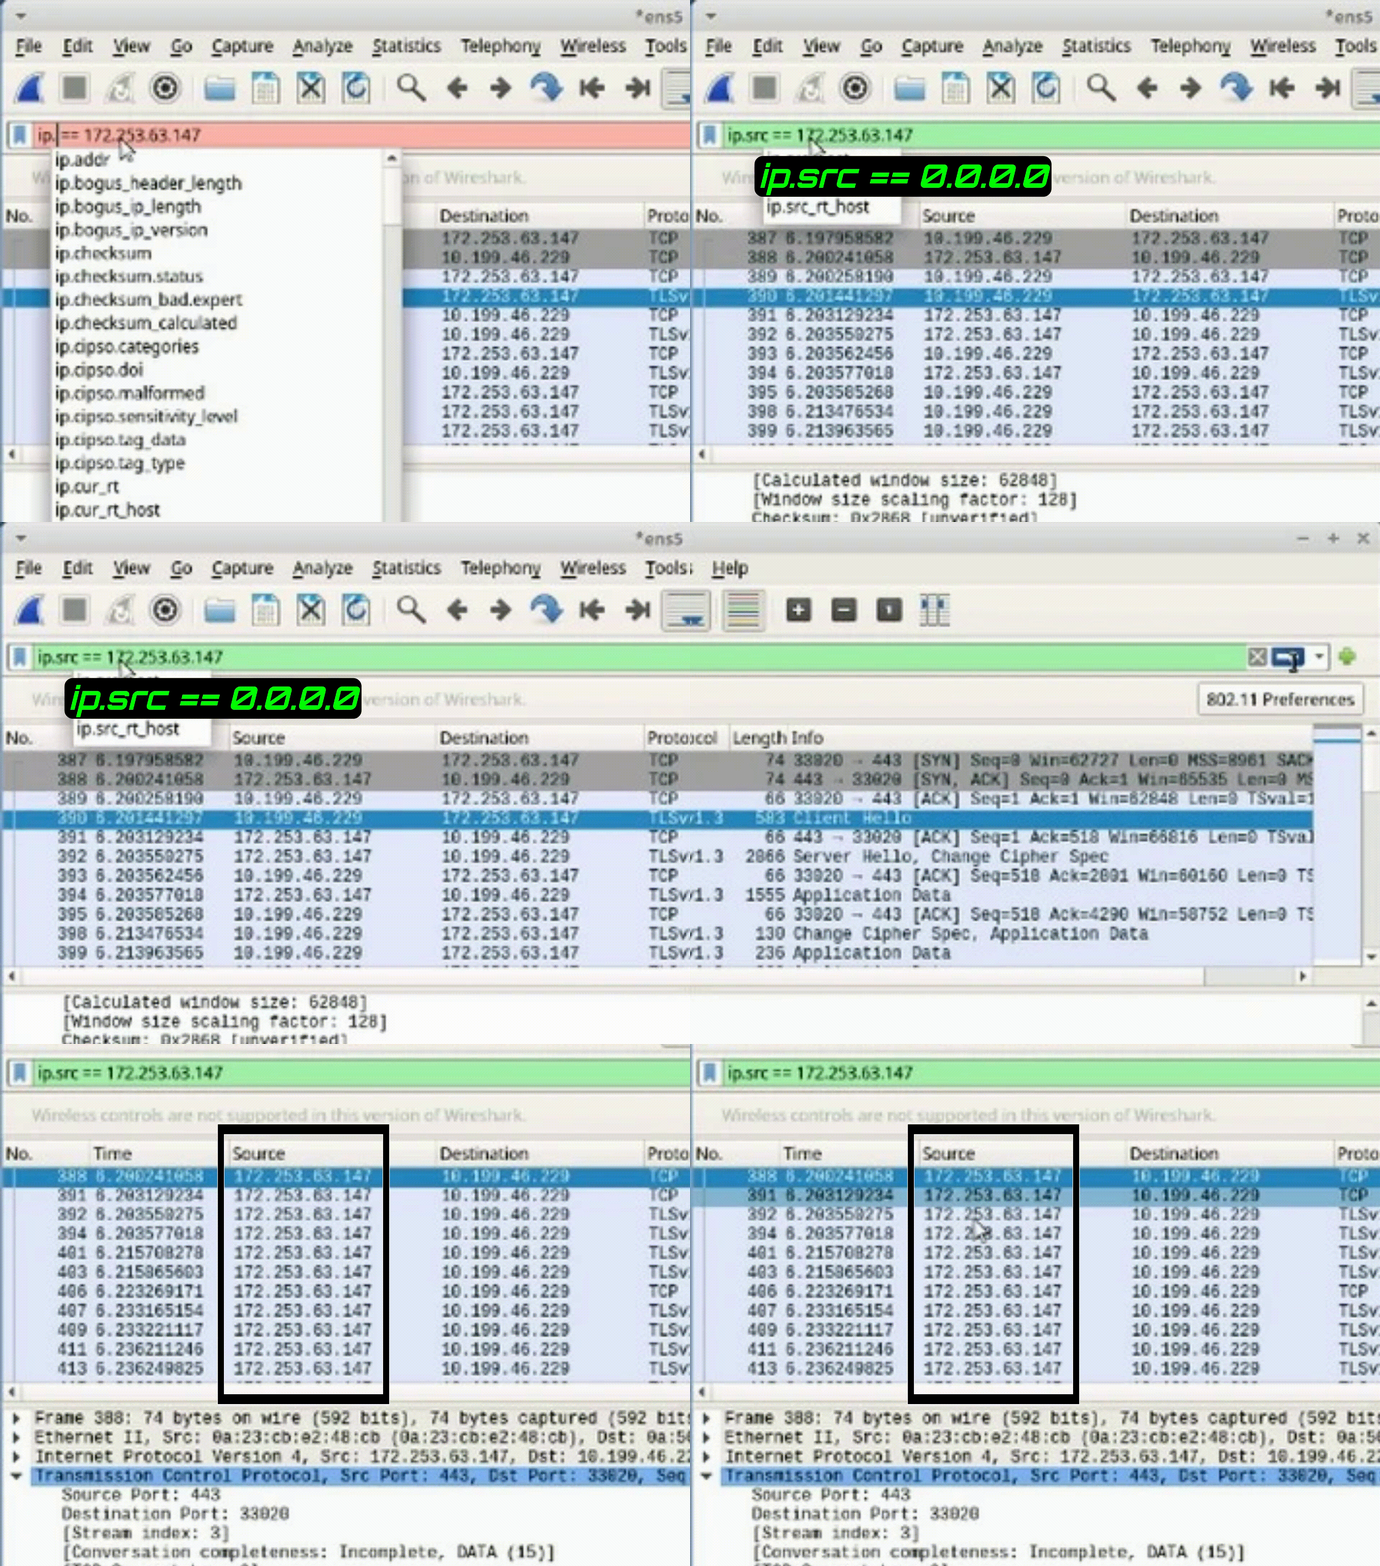
Task 3: Filter for Source or Destination IP Address
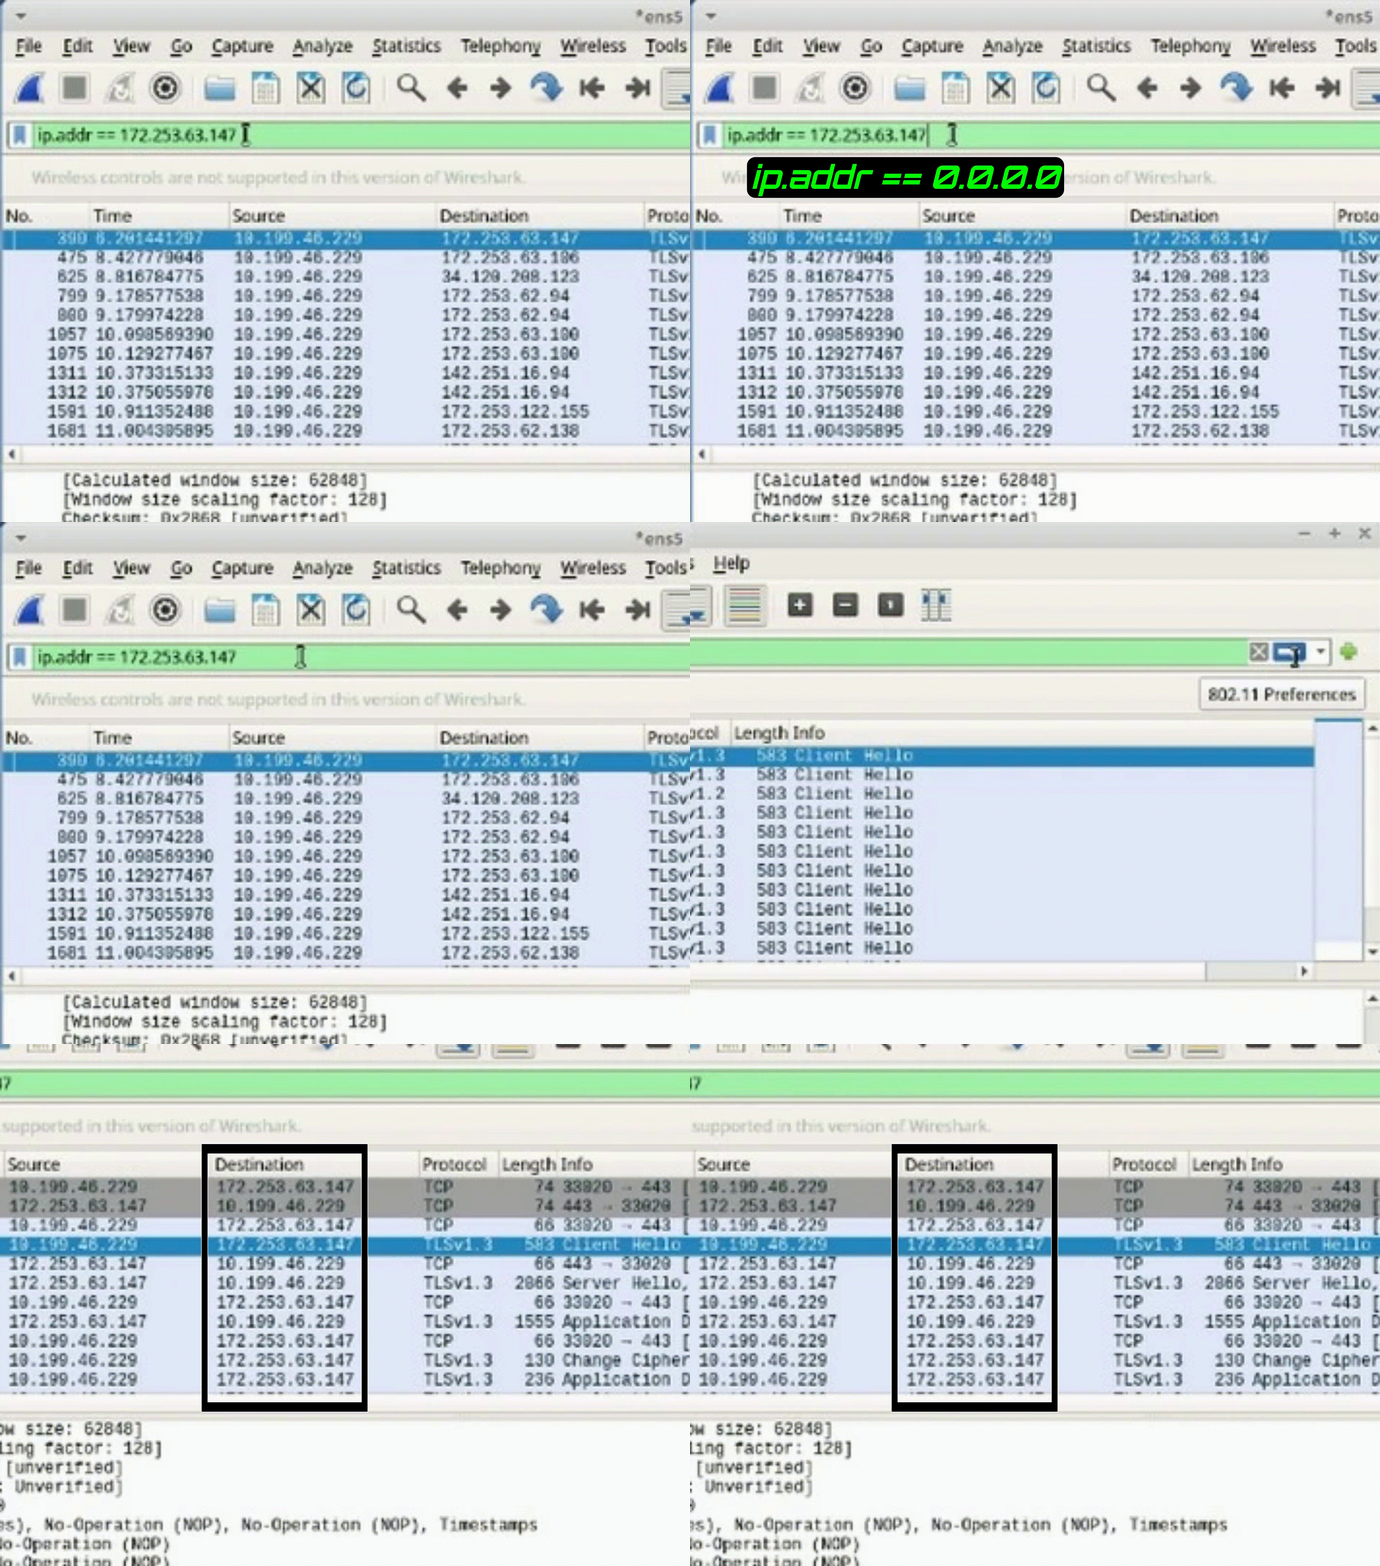
1. Modify the filter to display packets from a specific source or destination IP address (e.g., "ip.src == 142.250.31.103").
2. Observe the packets associated with the specified IP address (e.g., “ip.addr == 142.251.163.105”).
*Filtering by IP address aids in isolating network issues and identifying patterns of communication.
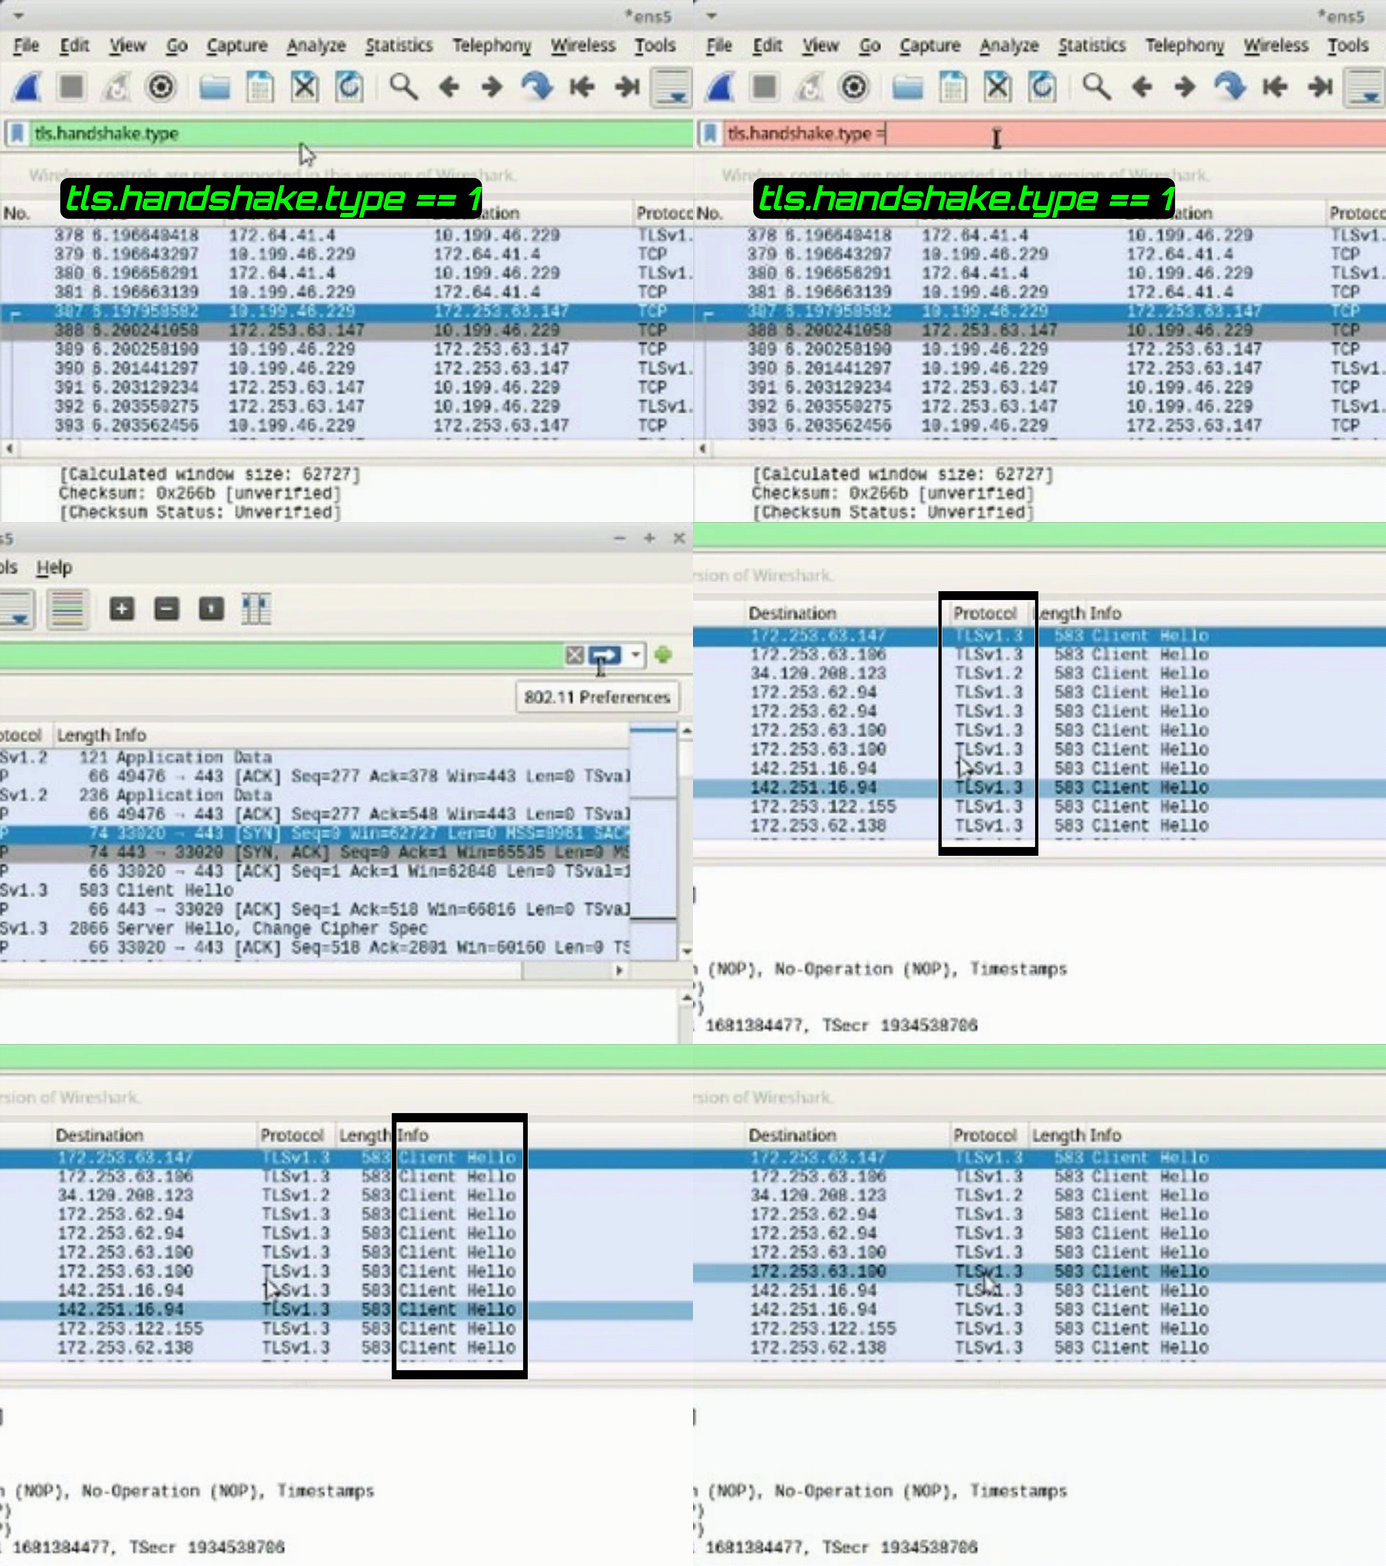
Task 2: Filter for TLS Handshake
1. Adjust the display filter to show only the TLS handshake with "tls.handshake.type == 1"
*Understanding TLS handshakes is crucial for recognizing secure connections and their attributes in a packet capture.
Step 4: Analyze packet traffic using display filters
Task 1: Detect Specific IP Address in Capture
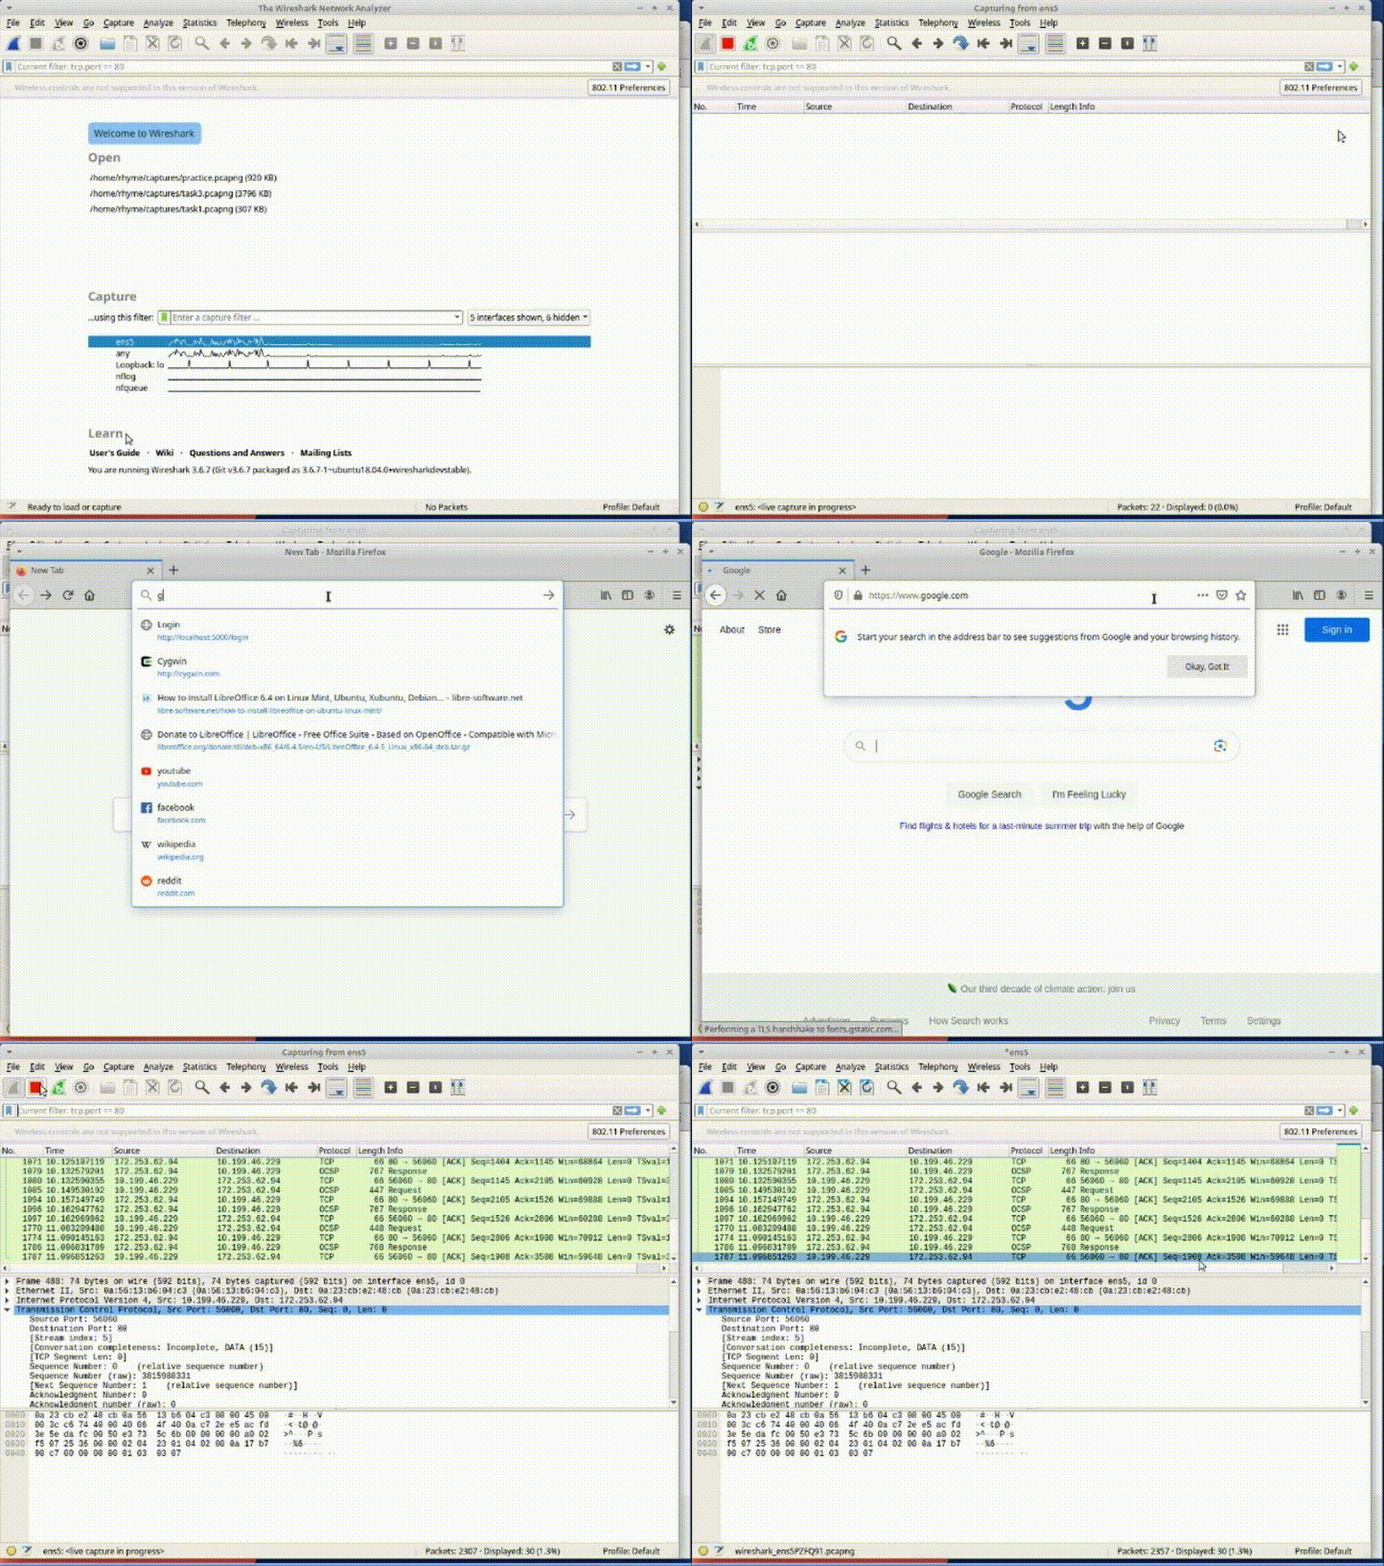
1. Clear browser data and cache for accurate web page loading.
2. Begin packet capture in Wireshark.
3. Visit a website in the browser (e.g., google.com).
4. Stop the packet capture.
5. Apply display filter to detect specific IP address (e.g., Google's IP) in the captured packets.
*This task helps to locate specific IP addresses within captured packet traffic, aiding in diagnosing potential server issues.
Practice: Packet Capture and Display Filtering Practice with Wireshark
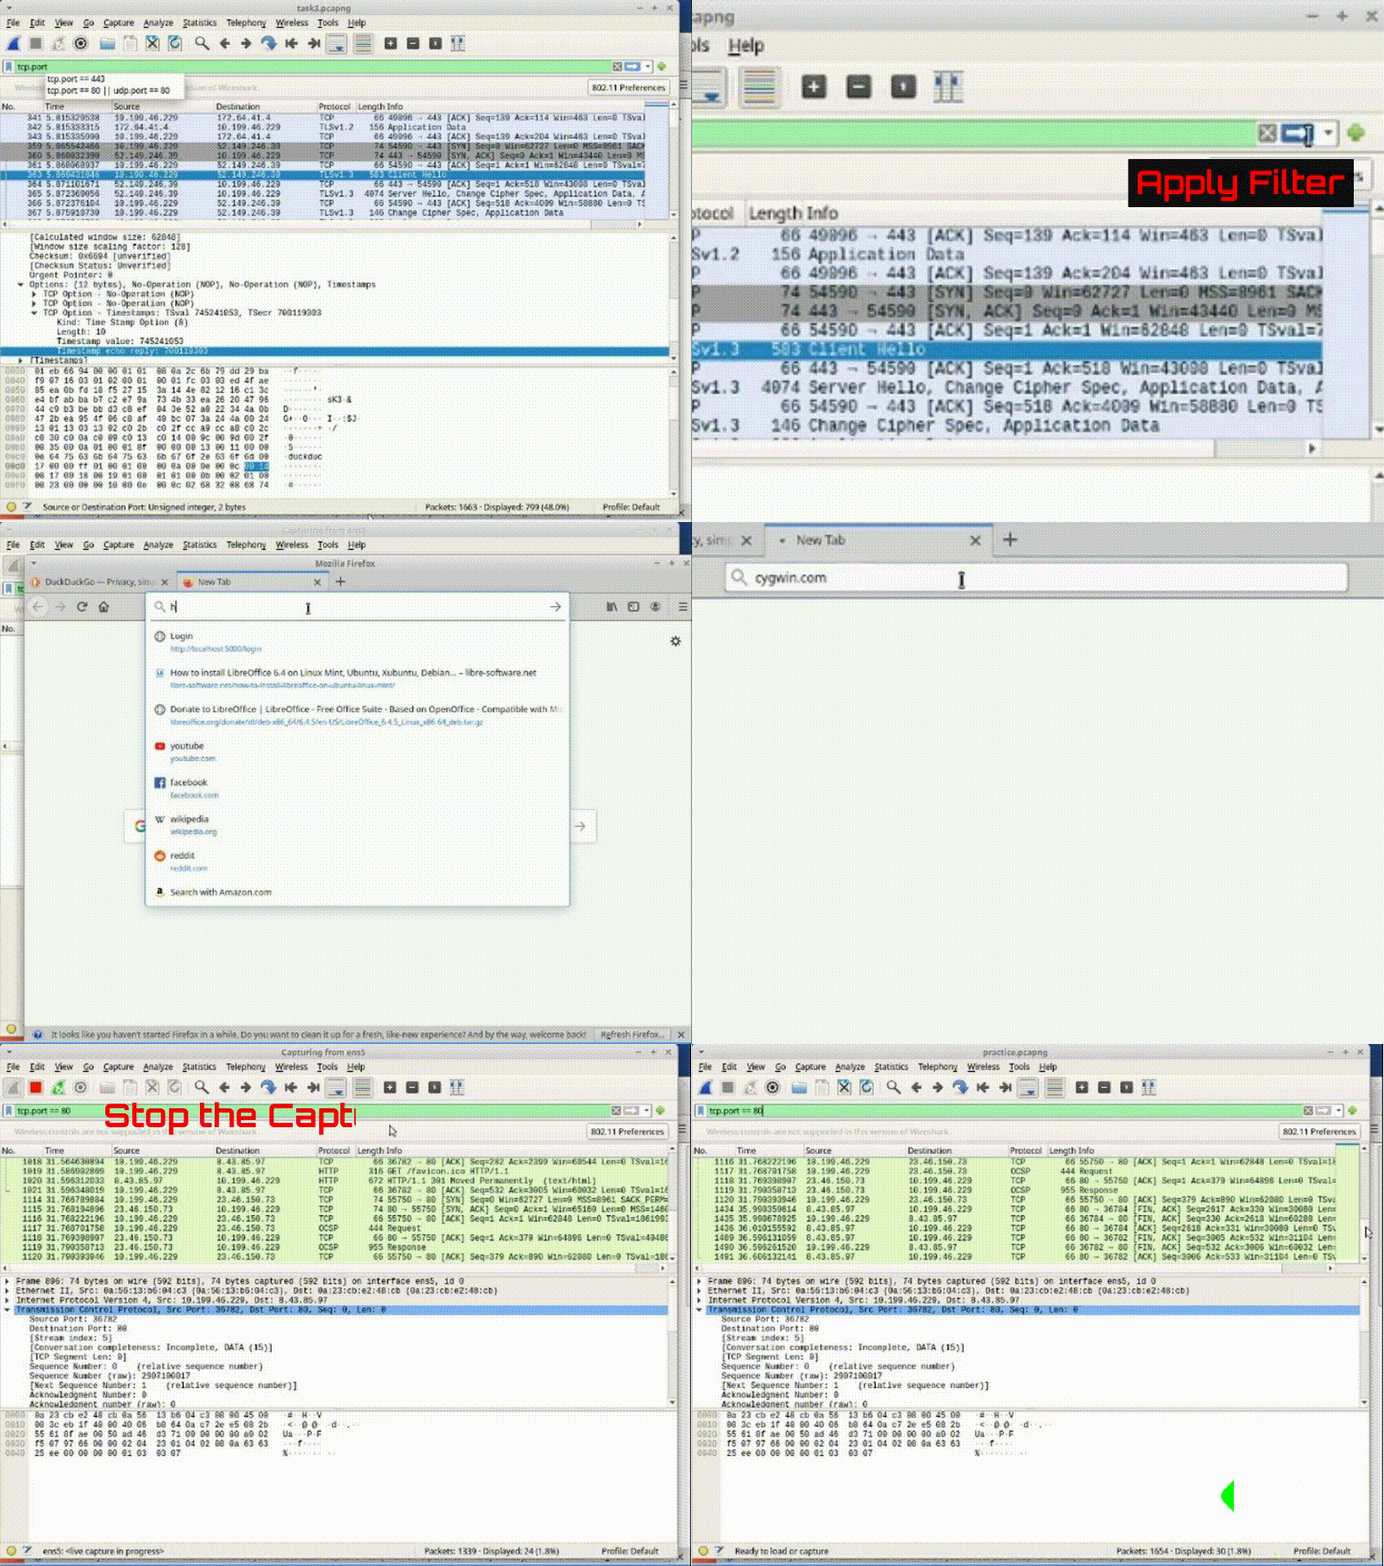
Task 1: Capture and Display HTTP Packets
• Begin a packet capture in Wireshark on the Ethernet network.
• Open the Firefox browser and navigate to "http://cygwin.com".
• Stop the packet capture.
• Apply the display filter for HTTP packets (TCP port 80) to view only HTTP traffic.
• Save the capture file, naming it "Practice."
Task 3: Identify HTTPS Packets
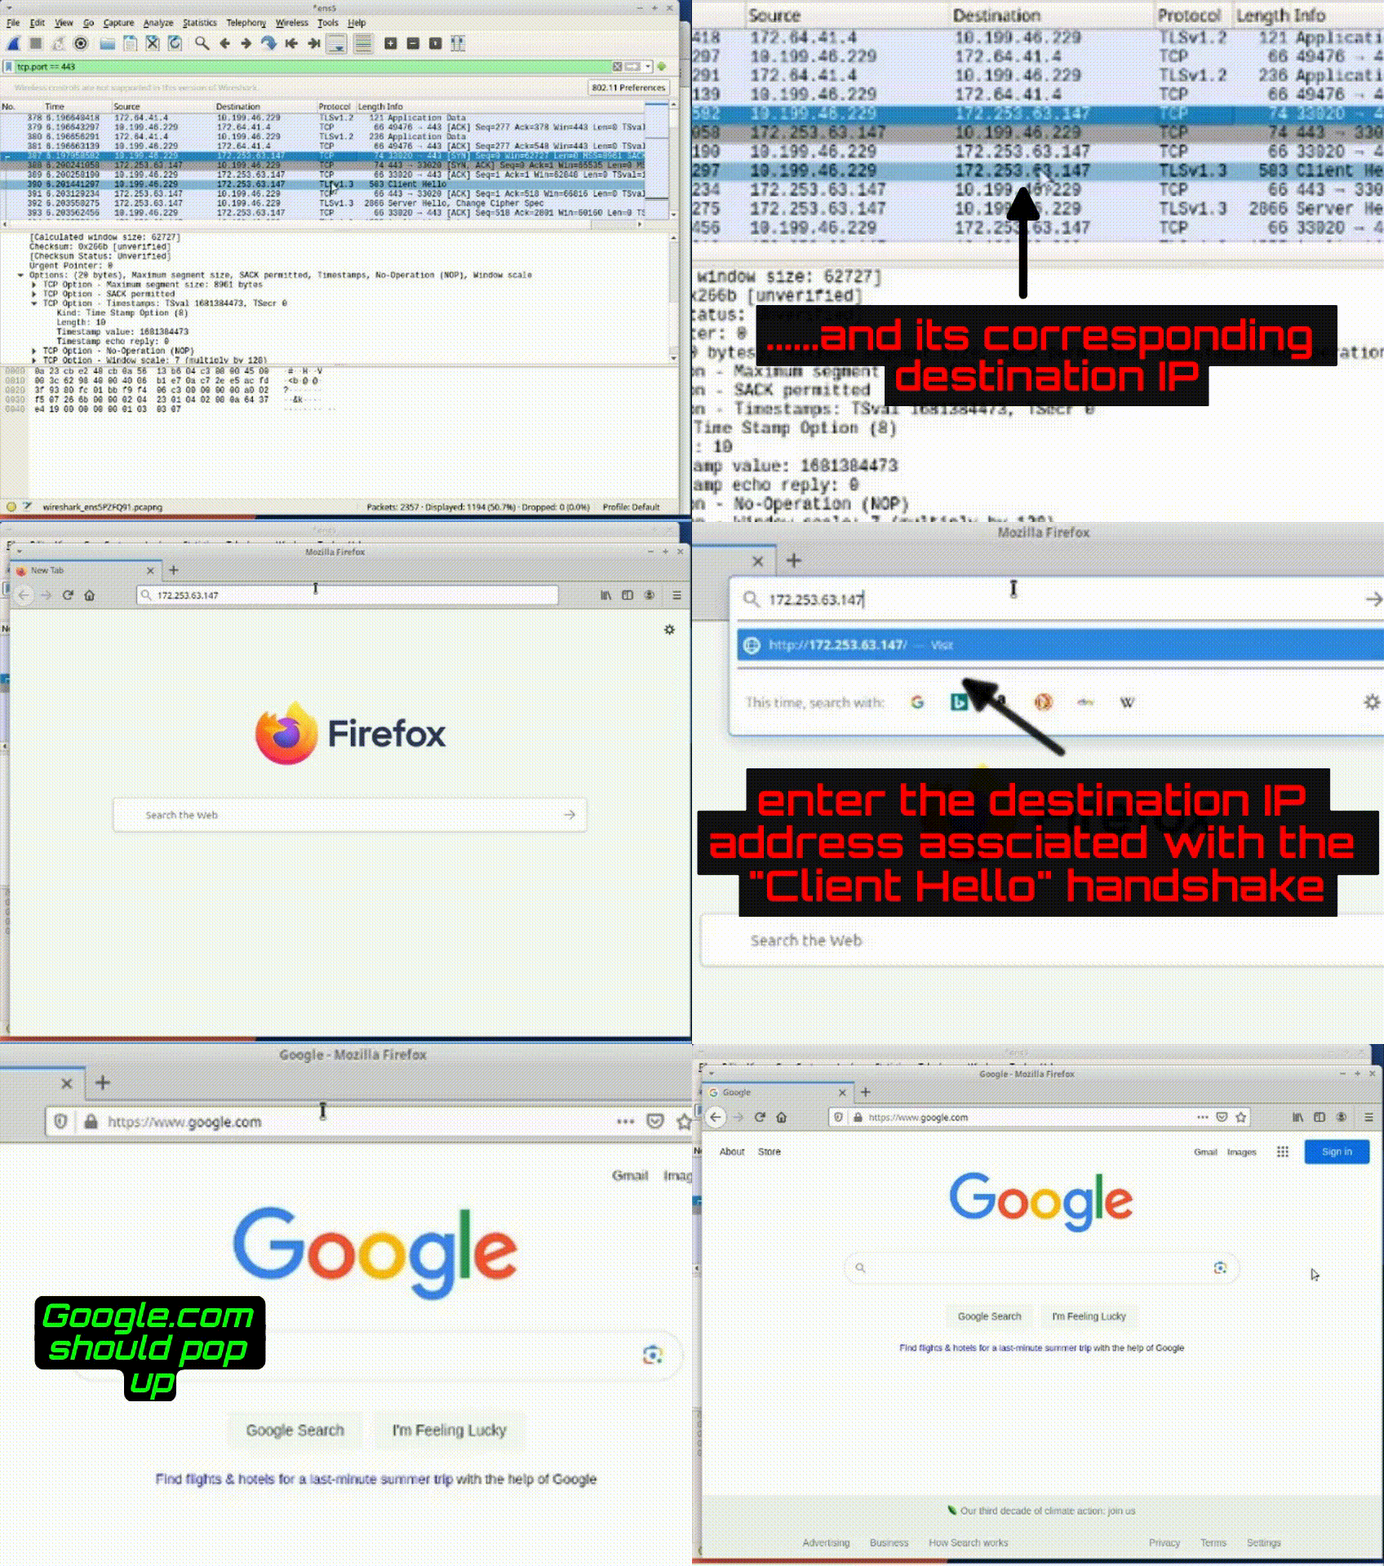
1. Find the "Client Hello" packet, representing the initiation of HTTPS connection.
2. Note the destination IP address (e.g., 52.149.246.39) associated with the website.
3. Open a new browser tab and enter the destination IP address.
4. Observe the IP address correctly leads to the website's domain.
*Recognizing packet attributes and their significance aids in understanding network behaviors and verifying web addresses.
Task 2: Apply Display Filter for HTTPS Packets
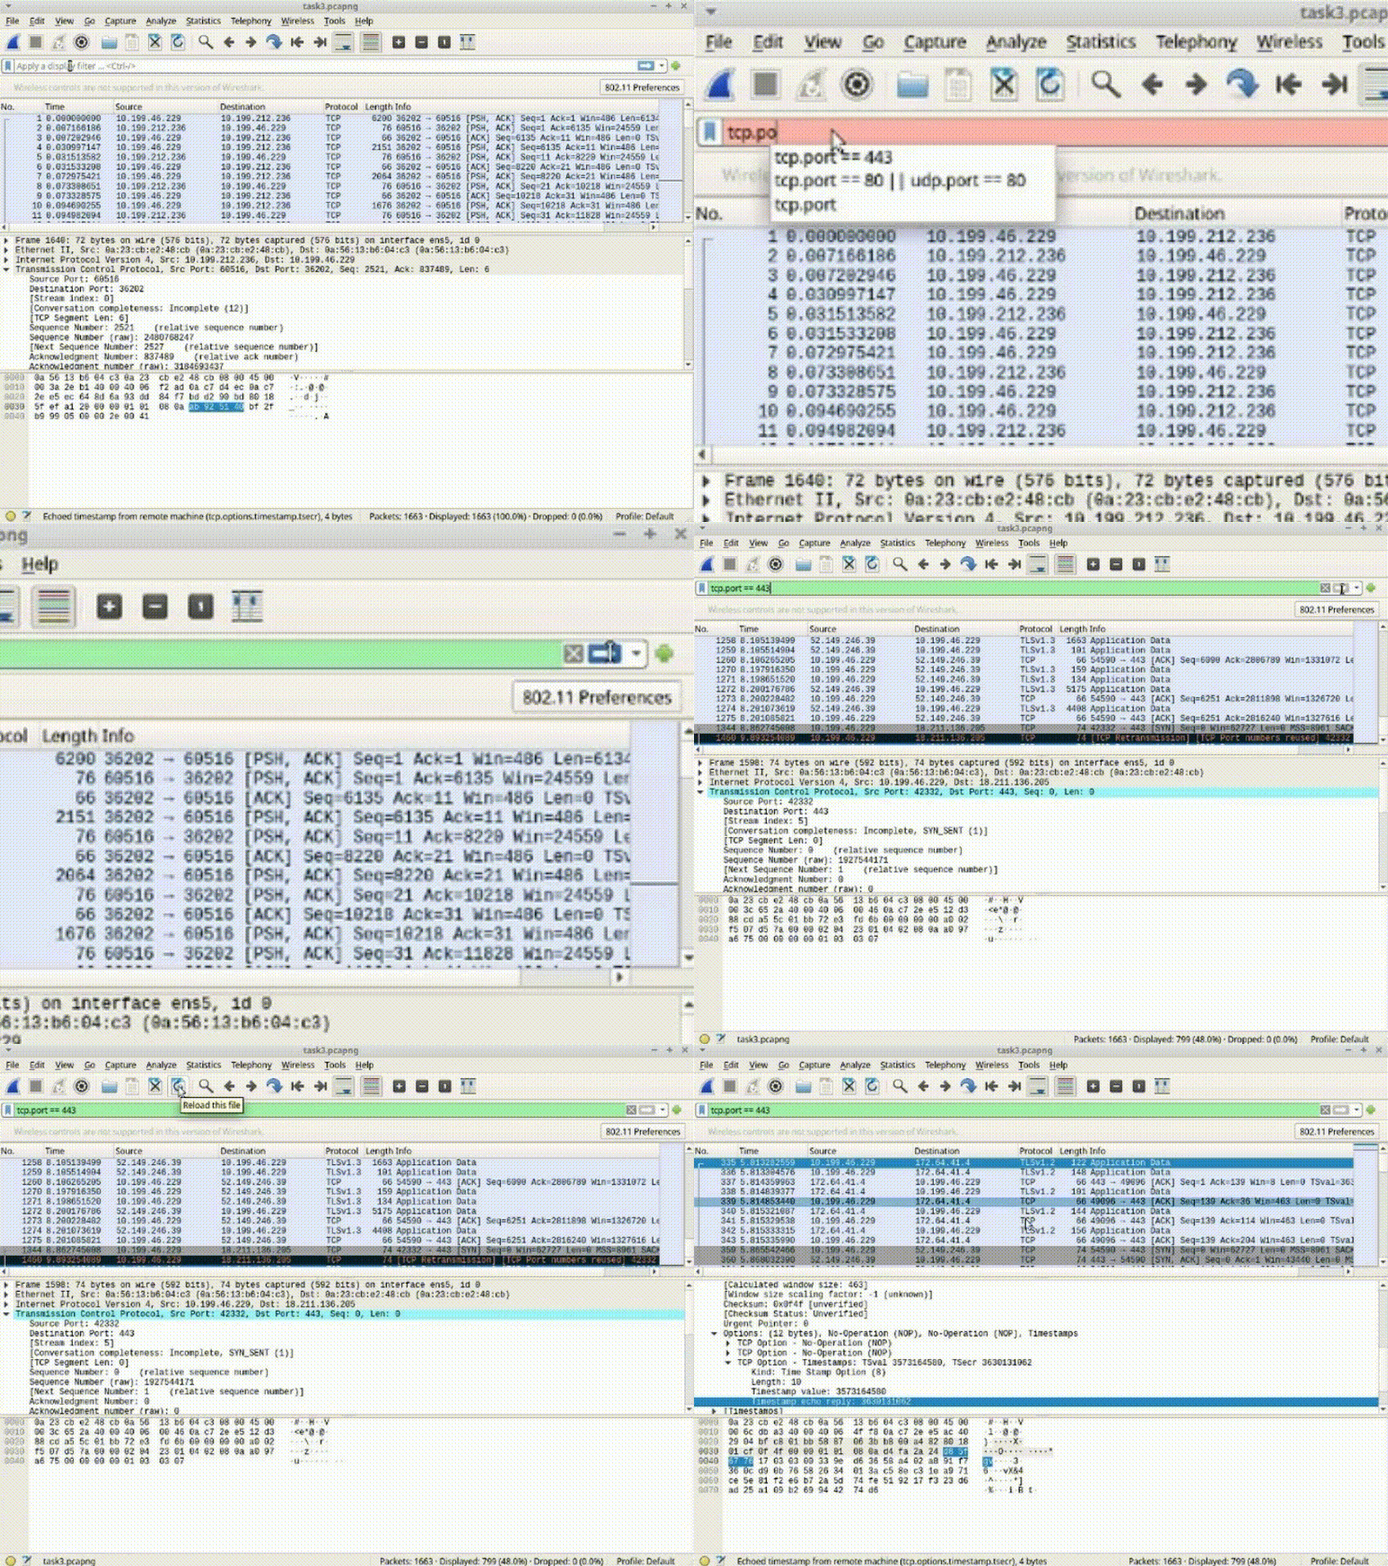
1. In Wireshark, use the display filter section.
2. Enter the filter: tcp.port == 443.
3. Click on "Apply Display Filter" to show only packets on port 443 (HTTPS).
4. Reload the packet capture file.
*Display filters refine the analysis, helping to identify specific types of packets, such as HTTPS traffic.
Step 3: Use a display filter to detect and analyze HTTPS packets
Task 1: Capture and Save Packets
1. Open Wireshark and begin a packet capture.
2. Visit the desired website (e.g., duckduckgo.com) in a web browser.
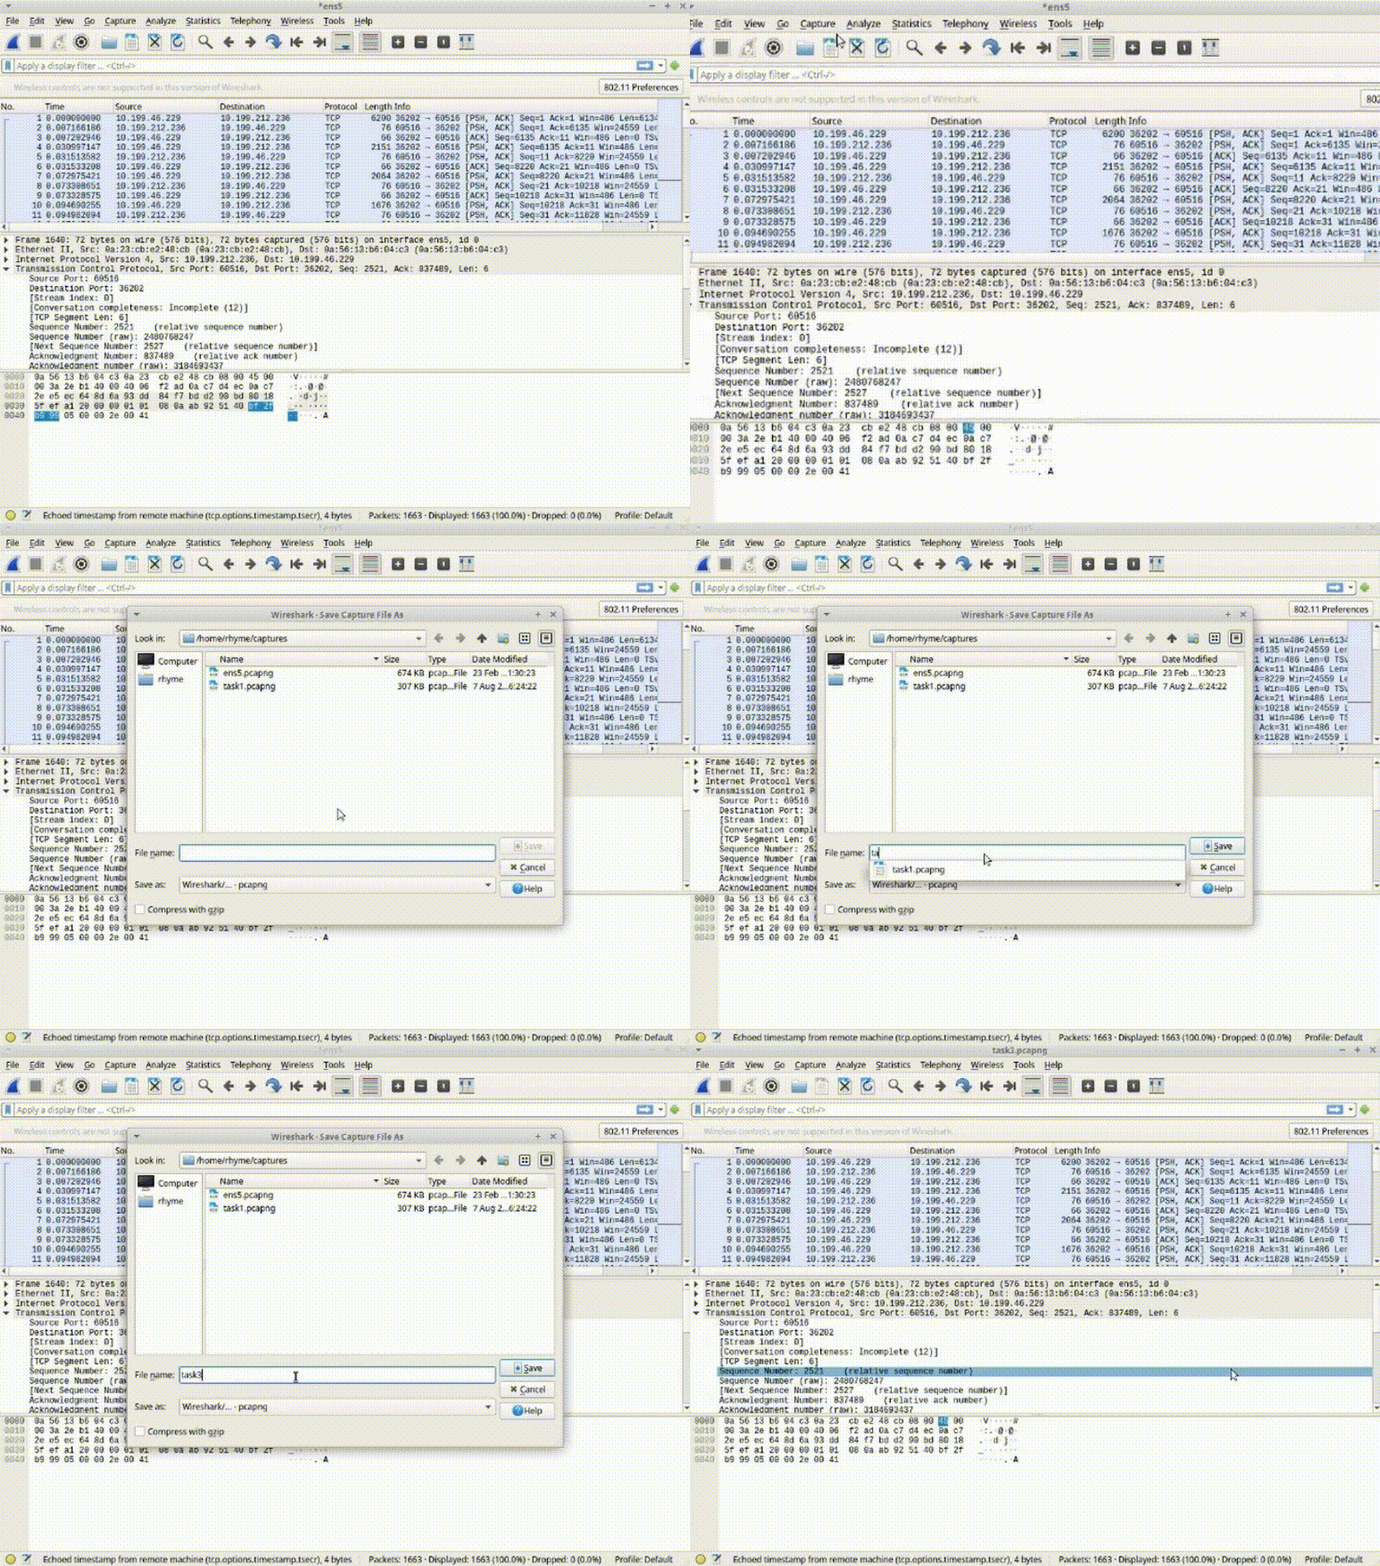
3. Stop the packet capture and save it to a file named "Step3."
Step 2: Start a packet capture on an Ethernet port and save it to a file
Task 1: Capture and Save Packets on a Detected Network
Open WireShark
Begin capturing packets by selecting the appropriate network interface (Ethernet adapter/ens5) and clicking the blue shark fin icon.
Stop packet capture using the red square icon; remember that ongoing capture without stopping can lead to memory issues.
*Capturing and saving packets allows for in-depth analysis of network behavior, identification of patterns, and the detection of potential security threats.
Task 2: Save Captured Packets for Analysis
Save the captured packets to a file by clicking the save icon and providing a descriptive name.
Note that saving is only possible after stopping packet capture.
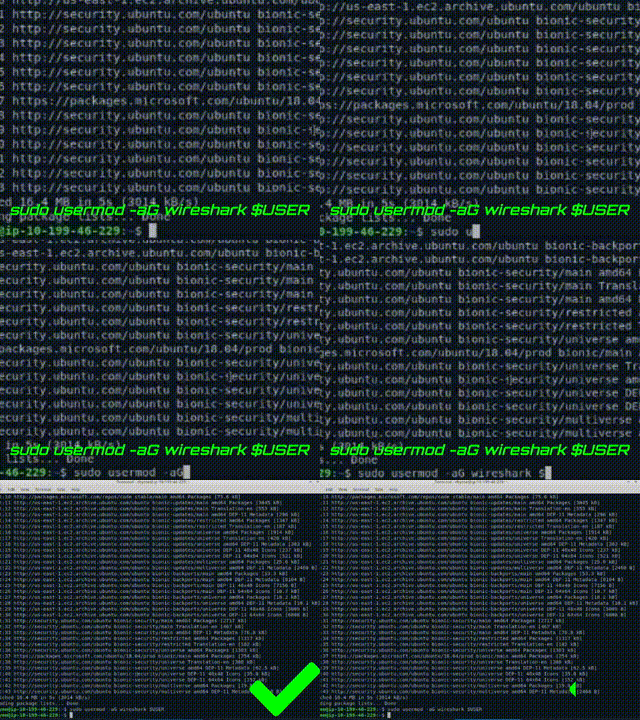
Add user with packet capture capabilities to the Wireshark using this command: sudo usermod -aG wireshark $USER
*Proper installation and setup of WireShark with the correct permissions prevent potential system damage and enhance security by avoiding super user privileges.


